Hello Folks, Oct'18 release of Microsoft Dynamics 365 Portal includes so many number of features, one of the best features is management of SharePoint documents inside Dynamics Portals. or can say we can Integrate the SharePoint with Portal.
SharePoint documents for portals provides the following features like Upload, Download, Delete the document in a SharePoint Library via Portals.Portal users can also create sub-folders to organize their documents.
Follow the steps to Integrate the SharePoint with Portal :


Step 5.2: Now give the web roles as per your requirement.

2nd Entity permission :-


Now check in your Portal. You can now upload, view, download, delete the document from SharePoint via portal.

SharePoint documents for portals provides the following features like Upload, Download, Delete the document in a SharePoint Library via Portals.Portal users can also create sub-folders to organize their documents.
Follow the steps to Integrate the SharePoint with Portal :
Step 1: Enable Document Management functionality in Dynamics 365 :
Document Management functionality by using server-based SharePoint integration allows Dynamics 365 (online) and SharePoint Online to perform a server-to-server connection. To enable server-based SharePoint integration with Dynamics 365 (online) and SharePoint Online, follow these steps.
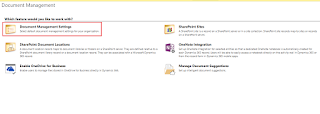
Step 1.1: Go to Settings > Document Management.

Step 1.2: Click Enable server-based SharePoint integration.

Step 1.3: A Pop-Up of Enable server-based SharePoint Integration will appears. Here click on Next button.

Step 1.4: Make sure Online is selected under 'Select where your SharePoint sites are located' and then click Next.

Step 1.5: Now enter the URL for the SharePoint site. The URL should be like 'https://name.sharepoint.com'. Click on Next.

Step 1.6: Site should be valid. Now click on Finish.

Step 2: Set up SharePoint integration from Portal :
Step 2.1: Go to Portal Admin Center.
Step 2.2: Go to Set up SharePoint Integration and click on 'Enable SharePoint integration'


Step 2.3: A Pop-Up will come and then click on Enable. This will enable the portal to communicate with SharePoint.

Step 2.4: Now You will also be redirected to provide your consent for the changes to be made in the Azure AD application. Click on Accept as show in below Snapshot.

After Successfully Enabled the integration your screen look like this :

Step 3: Enable document management for Entities :
Now you have to enabled the document management for the entity for which you want to manage the documents from portal.
Step 3.1: Go to Settings > Document Management.

Step 3.2: Click on 'Document Management Settings'.

Step 3.3: Select the entities for which you want to manage the documents and Enter the SharePoint URL and then click on Next.

Step 3.4: Check Based on entity to have document libraries and folders that are based on the Dynamics 365 Account entity automatically created on the SharePoint site. Users will not be prompted to create them.
If you don't want folders automatically created, clear the Based on entity check box.
Now click on Next.

Step 3.5: The Document Management Settings wizard shows the creation status of the document libraries and then click on Finish.

Step 4: Configure the Entity Form in Portal from where you want to manage the documents in SharePoint.
Here i am considering, you know how to Update/Edit the records from Portal but if you don't know about this then Click Here to know that.
Make sure Entity Permission is checked for the Entity Form.

Step 4.2: Now after this, Open the form (from where you want to manage the documents in Portal) in Form Editor from CRM side.
Step 4.3: Insert the Sub-Grid on form.

Step 4.4: Open the properties of Grid. Under Data Source, select Document Locations from the Entity list and select Active Document Locations from the Default View list.

Step 4.5: Save and publish the form once the sub-grid is added and configured.
Step 5: Create appropriate entity permission :
Two Entity Permission would be required to view and upload the documents.
1st Entity Permission :-
Step 5.1: Go to Portal > Entity Permission. Create a new entity permission for the Entity on which you applied Grid.


Step 5.2: Now give the web roles as per your requirement.

2nd Entity permission :-
Step 5.2: Create a new Entity Permission for Document Location Entity with Scope set to Parent.


Now check in your Portal. You can now upload, view, download, delete the document from SharePoint via portal.


