Hello folks, Today we will learn the best/latest way to connect our .Net Console Application with D365 CRM V9.x.
There are two ways to connect your .Net console application with D365 CRM.
- OrganizationServiceProxy: Oldest way.
- CrmServiceClient: Latest way.
In this article, We will learn the latest way (CrmServiceClient). Now follow the below steps:
Step 1: Create a project.
Step 1.1: Open the Visual Studio and Click on Create a new project.

Step 1.2: Now select the Console App (.Net Framework) and then click on Next.

Note: Make sure you have selected .Net Framework console app.
Step 1.3: Now give the name of project. select the .Net Framework 4.6.2. and then click on Create.

Note: Make sure you have selected this .Net Framework 4.6.2. If you do not have this Framework then download it. If the above option does not come for framework's selection, then you can check the framework inside the property of project.


Step 2: Install the packages.
Step 2.1: Now go to Tools > NuGet Package Manager > Package Manager Console.

Microsoft.CrmSdk.XrmTooling.CoreAssembly
and System.Configuration.ConfigurationManager NuGet package and then install both of it.
and System.Configuration.ConfigurationManager NuGet package and then install both of it.

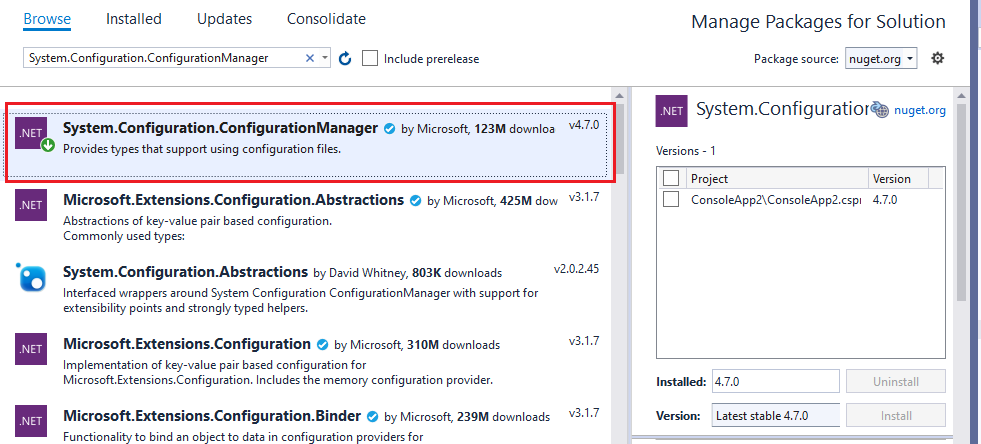
You must select I Accept in the Licence Acceptance dialog.

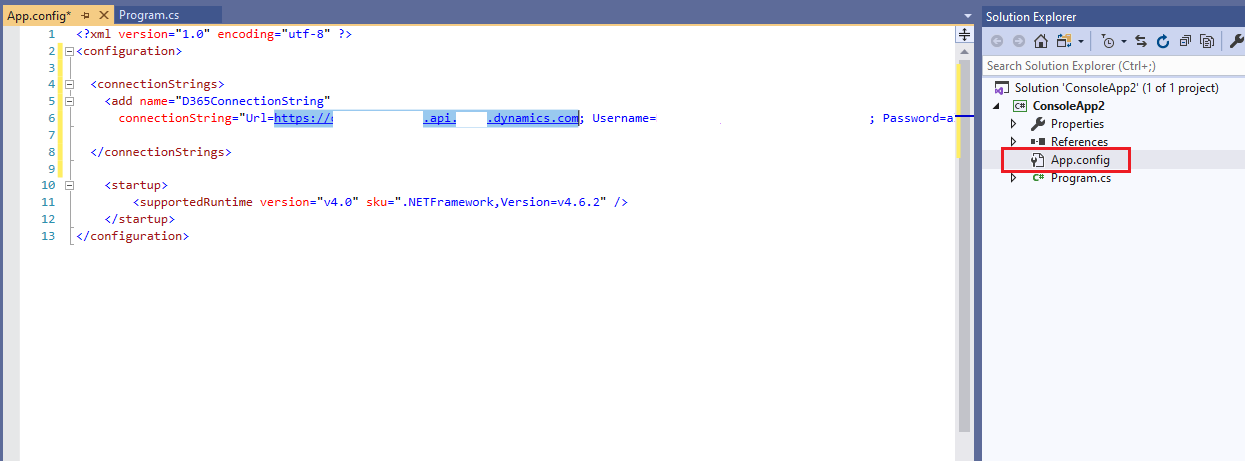
Step 3: Add Connection String.
Step 3.1: Go to App.config file and add a connection string.
<connectionStrings>
<add name="D365ConnectionString"
connectionString="Url=CRM_URL; Username=USER_NAME; Password=PWD; authtype=Office365"/>
</connectionStrings>
Step 4: Edit Main file.cs
Step 4.1: Go to Program.cs file and Add below using statements to the top of Program.cs
using Microsoft.Crm.Sdk.Messages;
using Microsoft.Xrm.Tooling.Connector;
using System;
using System.Configuration;
Step 4.2: Copy the below code and paste in your Main function.
var conn = ConfigurationManager.ConnectionStrings["D365ConnectionString"].ConnectionString;
using (var svc = new CrmServiceClient(conn))
{
WhoAmIRequest request = new WhoAmIRequest();
WhoAmIResponse response = (WhoAmIResponse)svc.Execute(request);
Console.WriteLine("Your UserId is {0}", response.UserId);
Console.ReadLine();
}

Now run the application. The output should look like this:

Check my video on this article.
Keep learning , Keep Growing, Keep sharing !!!
2 comments:
Nice Article.
"Thanks for sharing such a great post. It is very useful and informative. Valuable information you have shared. Also, check out
Multi-Factor Authentication
MFA
Two Factor Authentication"
Post a Comment