SharePoint Integration with D365 Portal.

Hello Folks, Oct'18 release of Microsoft Dynamics 365 Portal includes so many number of features, one of the best features is management of SharePoint documents inside Dynamics Portals. or can say we can Integrate the SharePoint with Portal.
SharePoint documents for portals provides the following features like Upload, Download, Delete the document in a SharePoint Library via Portals.Portal users can also create sub-folders to organize their documents.

Follow the steps to Integrate the SharePoint with Portal :

Step 1: Enable Document Management functionality in Dynamics 365 :

Document Management functionality by using server-based SharePoint integration allows Dynamics 365 (online) and SharePoint Online to perform a server-to-server connection. To enable server-based SharePoint integration with Dynamics 365 (online) and SharePoint Online, follow these steps.

Step 1.1: Go to Settings > Document Management.

Step 1.2: Click Enable server-based SharePoint integration. 
Step 1.3: A Pop-Up of Enable server-based SharePoint Integration will appears. Here click on Next button.
Step 1.4: Make sure Online is selected under 'Select where your SharePoint sites are located' and then click Next.

Step 1.5: Now enter the URL for the SharePoint site. The URL should be like 'https://name.sharepoint.com'. Click on Next.

Step 1.6: Site should be valid. Now click on Finish.

Step 2: Set up SharePoint integration from Portal :

Step 2.1: Go to Portal Admin Center.

Step 2.2: Go to Set up SharePoint Integration and click on 'Enable SharePoint integration'

Step 2.3: A Pop-Up will come and then click on Enable. This will enable the portal to communicate with SharePoint.

Step 2.4: Now You will also be redirected to provide your consent for the changes to be made in the Azure AD application. Click on Accept as show in below Snapshot.

After Successfully Enabled the integration your screen look like this :

Step 3: Enable document management for Entities :

Now you have to enabled the document management for the entity for which you want to manage the documents from portal.

Step 3.1: Go to Settings > Document Management.
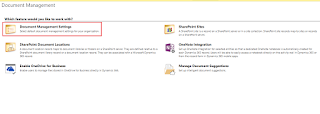
Step 3.2: Click on 'Document Management Settings'.
Step 3.3: Select the entities for which you want to manage the documents and Enter the SharePoint URL and then click on Next.

Step 3.4: Check Based on entity to have document libraries and folders that are based on the Dynamics 365 Account entity automatically created on the SharePoint site. Users will not be prompted to create them.
If you don't want folders automatically created, clear the Based on entity check box.
Now click on Next.


Step 3.5: The Document Management Settings wizard shows the creation status of the document libraries and then click on Finish.

Step 4: Configure the Entity Form in Portal from where you want to manage the documents in SharePoint.

Here i am considering, you know how to Update/Edit the records from Portal but if you don't know about this then Click Here to know that.

Make sure Entity Permission is checked for the Entity Form.

Step 4.2: Now after this, Open the form (from where you want to manage the documents in Portal) in Form Editor from CRM side.

Step 4.3: Insert the Sub-Grid on form.

Step 4.4: Open the properties of Grid. Under Data Source, select Document Locations from the Entity list and select Active Document Locations from the Default View list. 

Step 4.5: Save and publish the form once the sub-grid is added and configured. 

Step 5: Create appropriate entity permission :

Two Entity Permission would be required to view and upload the documents.

1st Entity Permission :-

Step 5.1: Go to Portal > Entity Permission. Create a new entity permission for the Entity on which you applied Grid. 


Step 5.2: Now give the web roles as per your requirement.


2nd Entity permission :-
Step 5.2: Create a new Entity Permission for Document Location Entity with Scope set to Parent.


Now check in your Portal. You can now upload, view, download, delete the document from SharePoint via portal.

Restrict D365 Portal access by IP address.

We all know that D365 Portal is public i.e. it can be accessible by anyone from any computer. Now in Oct'18 release of D365 Portal, we can restrict access to our portal from IP addresses. We will provide some IP address in allow list. When a request to the portal is generated from any user, their IP address is evaluated against the allow list. If the IP address is not on the list, the portal displays a web page with an HTTP 403 status code.
 Once you add an IP address to the allow list, the portal will be accessible to the specified IP address only. If you try to access the portal from any other IP addresses, access will be denied and a web page with an HTTP 403 status code is displayed. The content of this web page is static and cannot be modified.

 NOTE: You must specify a public IP address that can be accessed by the portal. Private IP address can't be accessed by the portal.

 Follow the steps to do this:
 Step 1: Go to Portal Admin Center.

 Step 2: Now go to Set up IP address restriction.

 Step 3: Now select Add an IP address (+).


Step 4: In the Add an IP address window, Enter the following values:

  • Select type of IP address: Select whether the IP address is IPv4 or IPv6.
  • Specify IP address in CIDR notation: Specify the IP address in CIDR notation.

Now Click on Configure.


Now we have List of IP address which can access portal.


Upload,Download ,Edit, Delete Document , Working with Notes in D365 Portal.

Sometime we have a requirement like user can able to Upload, Download ,Delete ,Edit documents from portal. In this post i will show you how to achieve this requirement. we have Two ways to achieve this scenario. I will explain both of ways one by one.

Before moving forward, here i am considering, you have basic knowledge of entity form (like Create/Update/Delete records). If you do not know about this then click Here to know that.

Method 1 : This Method is used when we Edit/Update the records from Portal. We can not used this when we create the record. 


Step 1: Open CRM and add Notes/Timeline section in your CRM form on which you want to apply Notes from portal.

Step 2: Make Notes the default tab.

Step 3: Now open Entity form in portal (portal > entity form) on which you want to add Notes section. Mode of Entity Form should be Edit. (Because this method is used in case of when we update the records from portal )

Step 4: Scroll down your Entity Form record and reach at Entity Form Metadata Sub-grid.
Step 5: Click on + icon to create a new Entity Form Metadata.
Type: It must be Notes.
Create Enabled: Set it true to create note from Portal.
Edit Enabled: set it true to edit the notes from Portal.
Delete Enabled: set it true to delete the notes from Portal.

Step 6: Now scroll up Entity Form and make sure Entity Permission checkbox should be checked.

Step 7: Now go to Portal > Entity Permission.

Step 8: Create a new Entity Permission.
Name: Give the name of permission.
Entity Name: Select Note entity.
Website: Select website on which you are working.
Scope:  Select Global Scope and checked all check-boxes.


Step 9: Scroll Down the Record and reach Web Role Subgrid.

Step 10: Add web role here for this Entity Permission. The Web Role associated to the Portal Contact should also be associated with this Entity Permission. here i am admin that's why i added admin role.

Now Check in portal. Hope you are able to see Add Notes button as show in below Screenshot.

When you click on Add Notes, a popup will come, here you can give your Description and attach any documents.

After attach document, Now you are able to see your Notes/Documents.

 Now to Delete or Edit the Document, Click on icon as show in below screenshot. Here you can Delete and Edit your attachment also.


Now to Download the Document, just click on document.


Method 2: It can be used when we Create or Update the records from portal.


Step 1: Now open Entity Form record from which you want to attach documents from portal.

Step 2: Scroll down the record and reach at Add Attach File Section.
Attach File: Select this option to upload document from portal.
Allow Multiple Files: Select this option to upload multiple file in one time.
Attach File Storage Location: Give Note attachment.
Attach File Save Option : Give Notes.


Now Check in portal. you can see a upload file option. Here you can select the file which you want to upload.

After that you have to submit the form to upload the file.


Now to see your uploaded Attachments:

Step 3: Open CRM and add Notes/Timeline section in your CRM form from which you want to see Notes from portal.

Step 4: Make Notes the default tab.

Now check in Portal. you are able to see your uploaded documents.

To download the Notes : 
 Just Click on your uploaded document. If you got Mess like Not found as show in below Snapshot
 then follow the below step otherwise you can skip this.

Step 5: Now open Entity Form record from which you want to download the documents from portal.

Step 6: Now scroll down Entity Form and make sure Entity Permission checkbox should be checked.

Step 7: Now go to Portal Entity Permission.

Step 8: Create a new Entity Permission.
Name: Give the name of permission.
Entity Name: Select Note entity.
Website: Select website on which you are working.
Scope:  Select Global Scope and checked all check-boxes.


Step 9: Scroll Down the Record and reach Web Role Subgrid.

Step 10: Add web role here for this entity permission. The Web Role associated to the Portal Contact should also be associated with this Entity Permission. here i am admin that's why i added admin role.

Now you are able to download the Notes.
But with this 2nd Method, you are not able to Edit and Delete the Notes.


So that is based upon your requirement, you can use any method (method 1 or method 2).


Most Important Difference between method 1 and Method 2 is :
In method 1: you can upload document without submit entity form and you can Delete and Edit the notes also. but you can not upload multiple documents in one time. This method can be used when we update the records.

In method 2: To upload document, you have to submit Entity Form from portal but in this method you can upload multiple files. This method can be used when we Create/Update the records.


Issue Come: If you want to upload the document from CRM side and get visible in Portal side then during the upload document from CRM, add text *WEB*

D365 Portal Modify User's Profile Dropdown/Navigation Menu, Rename SignOut and Profile, add Web Page in User's Profile Dropdown/Navigation

Sometime we have a requirement like change or add one more web pages or add one extra drop-down in header's menu. To achieve this scenario, just hover the header's menu part and add pages in header's menu bar. but if you notice you are not able to modify User's Profile Dropdown/Navigation menu and you have a requirement to change it then how could we do this.

In this post i will show you, how we can modify or work with User's Profile Dropdown/Navigation menu. Here i have listed some of my requirements :-
  • Rename profile to My Profile.
  • Add one more web page in user profile drop-down.
  • Rename Sing Out to Logout.
Firstly i will show you, how we can rename profile to my profile and add one more web page in drop-down.

Step 1: Go to Portal > Web Link Sets in CRM.


Step 2: Open the record whose name is Profile Navigation(This is the record which is used for User's Profile Dropdown/Navigation ).

Step 3: Scroll down the record and reach Links Sub-grid. (The records in Sub-grid is same as number of web pages in User's profile navigation ).


Now to Rename the Profile :-- 

Step 4) Open Profile record and change it's name to My Profile.


  Now check in portal. It has been successfully changed.

Now i will show, How to add one more web page in User's Profile Dropdown/Navigation, Here i am considering, you have created your web page in CRM. if you do not know about this then click Here.

Step 5)  Now in Link Sub-grid of Profile Navigation, click on + icon and create a new Web Link and fill the needful information. And also scroll down the record and give display order.


Name: Give the Name what you want. (it will be visible in profile navigation)
Page: Now add web page in lookup field which you want to bind with this.
Display Order: Used to make sequences in web pages.

Now check in Portal :
Now i will show you, How to Rename Sign-out :-

Step 1: Go to Portal > Content Snippet.


Step 2: Create a new Content Snippet.

Name: it would be links/logout
Website: select website for which you are working.
Value: Give value which you want to show. Here i am giving Log Out.

Step 3: Now save the records and check in portal. (Before check in portal, Clear the cache in portal, do not know about cache in portal then click Here)

Get more than 10 records in Odata Query in D365 portal / ADX Studio portal.

When we fetch the data using Odata Query, we get only 10 records but if we need more than 10 records then how could we do this. Here i will show you two methods, with the help of these methods we can retrieve more than 10 records.

Method 1: Increase the page size.

Step 1: In this method, we don't need to change the code. Just go to Entity List from where you are retrieve the data. Open Entity List and increase the Page size number. Here i am changing it from 10 to 100. By default it;s size is 10.

Now check the data, you will get 100 records.

Method 2: Using Recursive.

Step 1: With the help of recursion, we can retrieve more than 10 records. Copy the below code and paste in your code editor.

 var  result ;
 function getData(){
    $.ajax({
type: "GET",
contentType: "application/json; charset=utf-8",
datatype: "json",
url: "~/_odata/Cases" ,
beforeSend: function(XMLHttpRequest) {
XMLHttpRequest.setRequestHeader("Accept", "application/json");
},
async: false,
success: function(data, textStatus, xhr) {              
         result =   data.value ;
url = data["odata.nextLink"];
if(url)
   getMoreData(url);
},
error: function(xhr, textStatus, errorThrown) {
Xrm.Utility.alertDialog(textStatus + " " + errorThrown);
}
});
}

  function getMoreData(url){
    $.ajax({
type: "GET",
contentType: "application/json; charset=utf-8",
datatype: "json",
url: url ,
beforeSend: function(XMLHttpRequest) {
XMLHttpRequest.setRequestHeader("Accept", "application/json");
},
async: false,
success: function(data, textStatus, xhr) {            
          result = result.concat(data.value);
  url = data["odata.nextLink"];
  if(url)
   getMoreData(url);

},
error: function(xhr, textStatus, errorThrown) {
Xrm.Utility.alertDialog(textStatus + " " + errorThrown);
}
});
  }


Now check the result, you will get all the records.

Use Jquery DataTable to show the list of data in D365 Portal / ADX Studio Portal.

As we all know that, To show the list of data in portal, We used the Entity List but sometime we have a requirement to show the filtered data that's why we have to use JQuery DataTable to show the list of data. In this post i will show you, How we can fetch the data from CRM and show this data as a table format in our portal.

PreRequisite:  You should know :
1)  How to use OData query in portal. if you don't know then Click Here to know that.
2)  About Web-Template. Click Here to know about that.

Step 1: Copy the below code and paste this code in your code editor and change the code as per your requirement. In this code i am fetching the Case Entity data using OData Query and bind the data in Table.

<link rel="stylesheet" type="text/css" href="https://cdn.datatables.net/1.10.19/css/jquery.dataTables.min.css">
<script type="text/javascript" charset="utf8" src="https://cdn.datatables.net/1.10.19/js/jquery.dataTables.min.js"></script>

<br>   

<body onload="showTable()">
<table id="caseTable" class="table">
   <thead>
<tr>
  <td>Title </td>
  <td>  Name  </td>
</tr>
   </thead>
</table>
</body>

<script> 
 function showTable(){ 
    // Fetch the Case Entity Data in JSon format.
    $.ajax({
type: "GET",
contentType: "application/json; charset=utf-8",
datatype: "json",
url: "~/_odata/Cases",
beforeSend: function(XMLHttpRequest) {
XMLHttpRequest.setRequestHeader("Accept", "application/json");
},
async: false,
success: function(data, textStatus, xhr) {
         result =   data.value ;
},
error: function(xhr, textStatus, errorThrown) {
Xrm.Utility.alertDialog(textStatus + " " + errorThrown);
}   
}); 

    // Now bind the JSon data in Table format
$('#caseTable').DataTable({
"aaData": result,
"columns": [                                                 
{ "data": "title" },  // Here give the column name(The data which you want to show).
{ "data": "title" }
]
});
}
  
</script>

Step 2: Now paste this code in your web template. 

Step 3: Now check your web page in your portal.


Sometime we get the error in pop-up form like "Cannot reinitialise DataTable".
To solve this error, add this code in your DataTable : "destroy": true,


When we fetch the data using Odata Query, we get only 10 records. To get more than 10 records, Click Here to know that.